Contribute Docs
Qitmeer is an Open-Source community and welcome everyone to give contribution with their own talent. In addition to coding, documentation is also an important work to share knowledge with the community. Here are the steps how we share our expererience of Qitmeer.
Install Hugo
Qitmeer Docs is powered by Hugo static web generator, it could convert Markdown articles to HTML pages. Therefore, you could focus on content authoring and let Hugo handle website styling and management. Besides, the generated HTML pages are staic, which means they are secure and fast to load.
You may install Hugo by budiling from source code.
$ mkdir $HOME/src
$ cd $HOME/src
$ git clone https://github.com/gohugoio/hugo.git
$ cd hugo
$ go install

$ hugo version
hugo v0.92.0-DEV darwin/amd64 BuildDate=unknown
Or follow this tutorial to install a prebuilt version.
https://gohugo.io/getting-started/installing
Depoit Qitmeer Docs locally
First, you need to fork Qitmeer Docs repo ("https://github.com/qitmeer/docs") to your own github namespace, which is “https://github.com/forchain/docs” in this case.
Then, download source code and launch web server:
$ git clone https://github.com/forchain/docs ~/github.com/forchain/docs
$ cd ~/github.com/forchain/docs/Document
$ hugo serve
...
Web Server is available at http://localhost:1313/docs/ (bind address 127.0.0.1)
Press Ctrl+C to stop
Open browser and test website is accesible. Address: http://localhost:1313/docs/
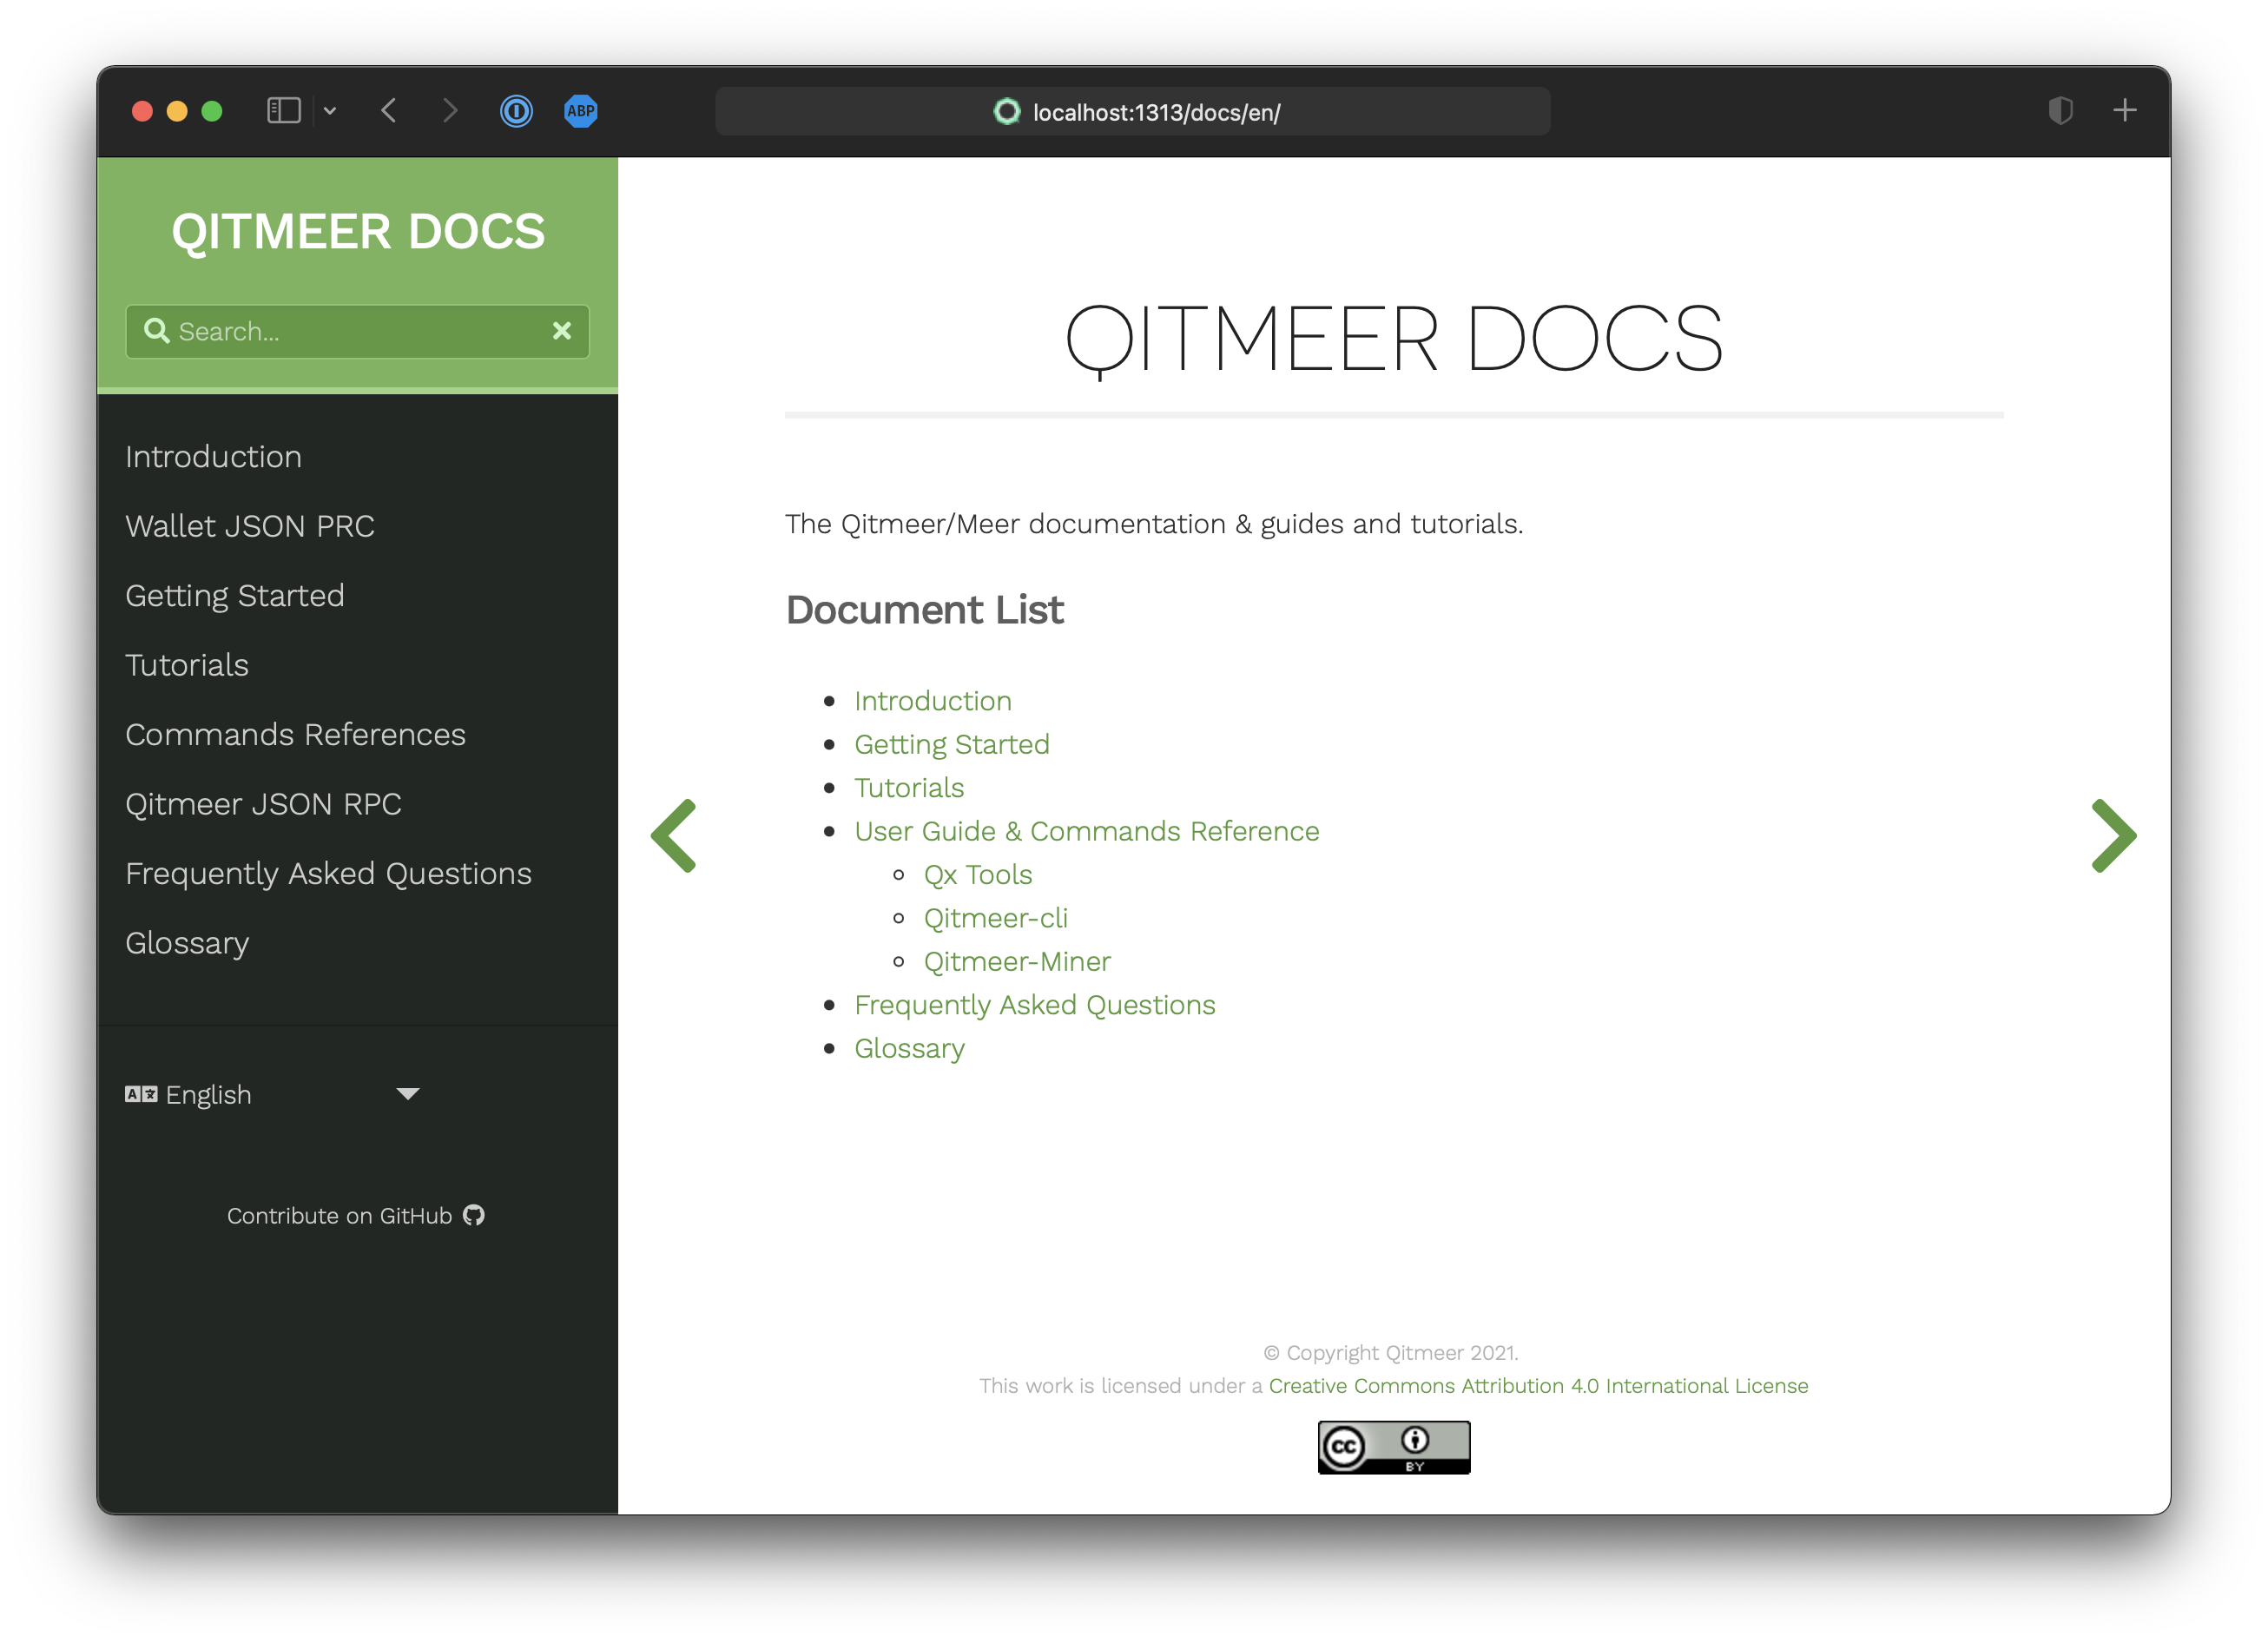
Figure1. Launch Qitmeer Docs
New document file
We need to create a subfolder under the content folder and then new a file named _index.en.md inside it.
You may complete those steps by one Hugo command:
# ensure you are under path ./Document
$ hugo new content/tutorials/contribute-docs/_index.en.md
Note
- the name of the subfolder must be in hyphen-case style, in this case, “contribute-docs”
- the en part indicates the language, you may subsititue with other languages, for instance, cn stands for Chinese. Or you may drop this part to disable the multiple language support, then it would be like “_index.md”
- The parts of the path are in line with the sitemap in the the left panel, for this case, this article is placed under Tutorials category.
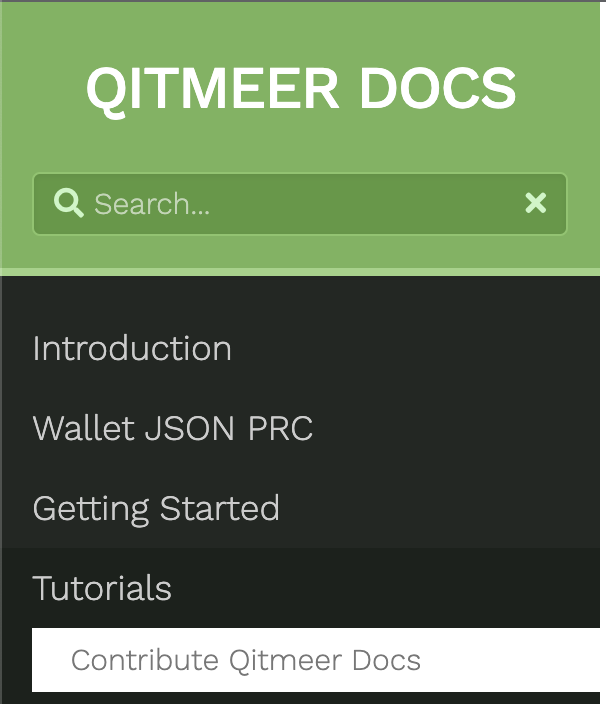
Figure 2. Doc category
Add link in index page
There is an index page include all the links under each category, it is located at the parent folder of the containing folder of document, which is content/tutorials/_index.en.md for this tutorial.
- [Contribute Docs](./contribute-docs)
Note
- it is a relative link to the containing folder
- The link cannot contain whitespaces, that’s why the naming style of the containing folder must be hyper-case.
Edit document
Front Matter
From the file extension “.md”, we could infer that it is a markdown document. Actually, it is an extented markdown file. We need to add some annoation in the front of the file, we could this “Front Matter”.
For this tutorial, it would be:
---
title: Contribute Qitmeer Docs

# Represents the sorting position of the sidebar
weight: 1

# According to the serial number
pre: "<b>1. </b>"

# When true, the page paragraph is displayed in the center
chapter: true

# This option needs to be set if the page has formula content
mathjax: true
---
The essential configuration item is “title”, which is “Contribute Qitmeer Docs” in this case. You may modify other config items if needed, such as “weight”, “chapter”, …, the comments above.
Markdown Content
Below the front matter separator ‘—’, you may fill the content of articles with markdown format. For this tutorial as example, it would be:
...
mathjax: true
---

Qitmeer is an Open-Source community and welcome everyone to give contribution with their own talent. In addition to coding, documentation is also an important work to share knowledge with the community. Here are the steps how we share our expererience of Qitmeer.

## Install Hugo
...
Note
Hugo will insert the title configured in Front Matter, so we should NOT add title in the content.
Images
The markdown is a text file and cannot embed images, therfore you should upload the images in a specified folder and add links to them.
For this tutorial, we already two figures. We make a folder under “Document/static/images”, let’s say “contribute-docs” for placing images dedicated to this tutorial, then move the images from their original folder to the newly created folder.
$ mkdir -p Document/static/images/contribute-docs
$ mv "/Users/Outlier/Library/Application Support/typora-user-images/image-20211218192001885.png" Document/static/images/contribute-docs/launch-website.png
$ mv "/Users/Outlier/Library/Application Support/typora-user-images/image-20211220190939112.png" Document/static/images/contribute-docs/doc-category.png
At last, replace the image links with new path. Note, the path should be a website absolute path rather than a local path, leading by “/image”.
Therefore, find the two links in the file of this document:


Replace them with respectively:


Submit documents
Qitmeer has a workflow to automate the tedious work of publishing in GitHub Pages, see:
https://github.com/Qitmeer/docs/blob/master/.github/workflows/gh-pages.yml.
Therfore, all you have to do is just submit the changes to Github and make pull request to the upstream branch.
$ git add .
$ git commit -m"contribute qitmeer docs"
$ git push
© Copyright Qitmeer 2021.
This work is licensed under a Creative Commons Attribution 4.0 International License
